You might not notice it at first glance, but the neat wooden trim around doors and windows – the architrave – is a design hero. This little detail makes your place look complete. Architrave Installation is one of those finishing touches that play a vital role in enhancing the aesthetics of a home. In other words, it pays to do it right.
So here’s the question: should you tackle Architrave Installation yourself, or call in the pros? (Trust me, I once saw a mate spend an entire Saturday on it – four hours of crooked cuts and missing strips later, he was on the phone to a carpenter!)
What Are Architraves and Why Install Them?
Architraves are the decorative mouldings that frame doors and windows. They cover the joint between wall and frame, creating a seamless transition and adding an extra layer of detail and sophistication. Think of them like the trim on a picture frame – without it, the wall looks unfinished.
In Brisbane’s mix of classic Queenslanders and sleek new builds, architraves set the tone. Even in a modern home, a simple 18mm architrave makes a room feel snug and polished. Installing architraves means carefully cutting and fitting these trims precisely so that the corners meet at perfect angles. That perfect fit truly frames your doors and windows with style and makes any Architrave Installation effort pay off.
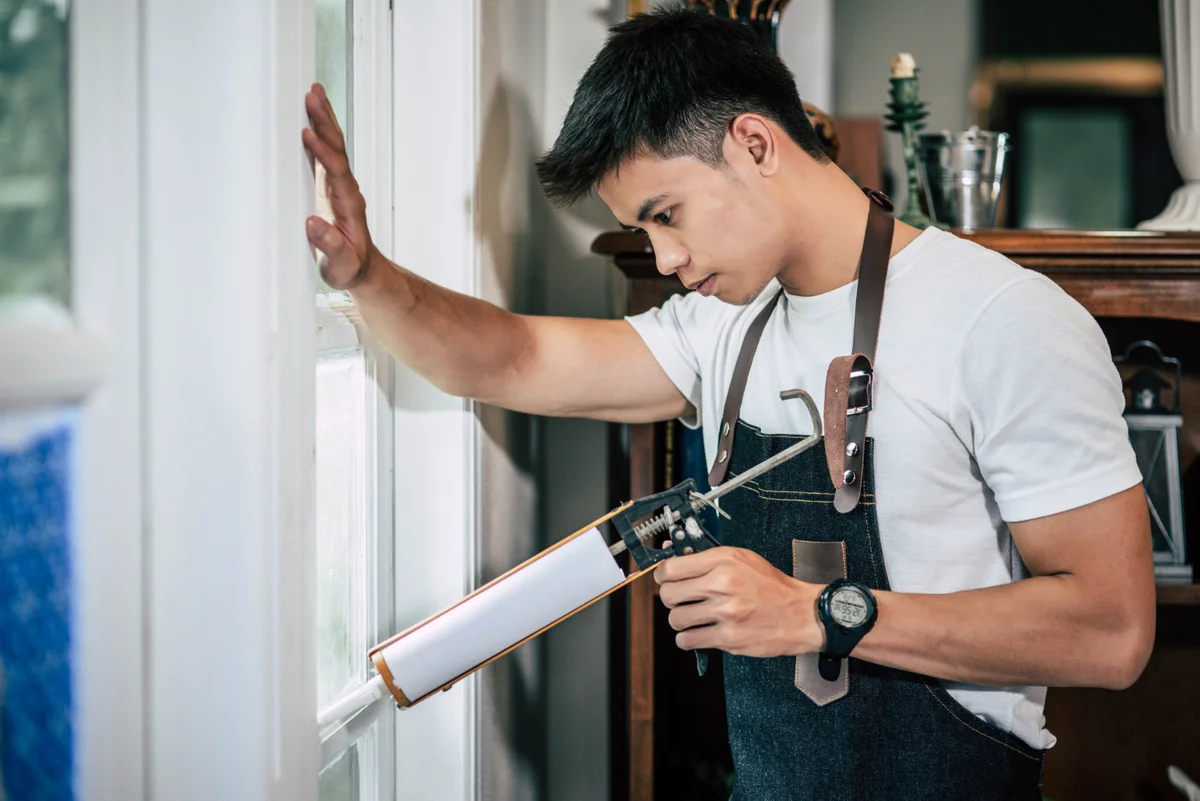
DIY Architrave Installation: Tools & Tips
If you’re up for DIY Architrave Installation, gear up like a pro carpenter. You’ll need:
-
A sharp mitre saw (or a hand mitre box)
-
A combination square or marking gauge
-
A sturdy hammer or nail gun
-
PVA wood glue
-
A pencil and damp cloth for glue cleanup
-
Safety gear (ear and eye protection)
One more tip: always order extra trim — about 15% more than you need to allow for bad cuts. Having a spare length or two has saved me more than once.
For a real DIY advantage, you can even find pre-cut, pre-primed architrave kits at hardware stores. These come with the mitred corners already done – you basically just cut to length and glue or nail them in place.
Also remember Queensland’s humidity: if you choose real timber trim, go for a stable hardwood like Tasmanian oak or merbau. Primed MDF is still the most budget-friendly, fool-proof option.
Double-check that walls and doorframes are fully dry and straight before you start – moisture or bowed frames will show up as gaps. Measure twice, cut once, and use a little caulk for sealing. With patience and these tips, even a first-timer can achieve a professional finish.
Common DIY Architrave Pitfalls
Here’s where things can go sideways. If the wall or doorframe isn’t square, the trim won’t sit right. Check that door jambs are level and reveals are flush before installing – otherwise, the architrave will twist or leave gaps.
Another common mistake? Rushing the cuts. Always cut one side at a time and double-check the angle before each saw stroke.
And remember – larger architraves should be nailed, not just glued. Glue alone might not hold a heavier profile in place, especially in Brisbane’s heat and humidity. Also, don’t skip ordering that extra 15% of material. Running short midway through an install is a nightmare (and yes, I’ve been there).
Professional Architrave Installation: What to Expect
Now let’s talk about letting someone else handle it. Hiring a professional carpenter takes the guesswork out of Architrave Installation. These tradespeople have done these exact cuts hundreds of times – making a flawless 45° mitre is second nature to them.
A pro will cut and join the trim perfectly, and they know exactly when to glue or nail each piece.
Besides skill, hiring a licensed carpenter means peace of mind. In Queensland, licensed builders carry insurance and follow local building codes, including the standards set by the Queensland Building and Construction Commission (QBCC). They’ll fix any surprises (like uneven plaster or warped frames) so you don’t have to.
The bottom line: what might take you a weekend, an experienced carpenter can knock out in a few hours – with a perfect finish on the first try.
DIY vs. Professional Architrave Installation: A Quick Comparison
| Aspect | DIY | Professional |
|---|---|---|
| Cost | Materials only and tool hire if needed | Materials + labour (approx. $45–$60/hr). Worth it for a guaranteed finish. |
| Skill Required | High – precise measuring and cutting needed | Low – the carpenter handles all precision cuts |
| Time | Longer (learning curve, extra cuts) | Faster (experienced installer, power tools) |
| Finish Quality | Risk of visible gaps or uneven joints | Tight joints and seamless finish |
| Warranty | DIY – no guarantees | Often covered by workmanship guarantees |
Architrave Installation Costs in Brisbane
Let’s talk budget. Architrave Installation isn’t usually a wallet-breaker. A 100mm-high primed MDF architrave runs about $90 for a 2.7m piece, and skilled carpenters charge roughly $45–$60 per hour.
So framing a doorway with fresh trim might only cost a few hundred dollars in total – not bad for a show-stopping result.
If DIY still tempts you, just remember to factor in your own time (and any potential waste) before diving in. A few bad cuts can erase those savings faster than you can say “Bunnings trip.”
Brisbane Home Considerations
Brisbane’s architecture ranges from charming Queenslanders to contemporary townhouses, and each style brings its own quirks. Older timber homes often have uneven walls or slightly off-square frames that make Architrave Installation tricky. Newer homes, on the other hand, usually have clean lines that demand flawless finishing.
Humidity is another big factor. Timber expands and contracts in our climate, so it’s smart to leave a few millimetres of expansion space when fitting. MDF trims handle Brisbane’s weather better but always keep them well-sealed with paint.
Conclusion: Which Path to Take?
So, should you pick up the mitre saw or the phone?
If you’re handy with tools and up for a weekend challenge, DIY Architrave Installation can be rewarding (and budget-friendly). But if you want guaranteed perfection without the headache, hiring the pros is the smarter move.
After all, architraves are the jewellery of your doorways – you want them fitting just right.
For professional Architrave Installation in Brisbane, Bernard Building has your back. Our skilled team will ensure your trim is flawless and stylish. Contact us today for a free quote or to discuss your project – after all, you deserve the best, so choose the best for your home.
Read Also: Smart Outdoor Living Renovation Ideas for Brisbane Yards
Frequently Asked Questions
What is Architrave Installation and do I need it?
It’s the process of adding decorative trim around your doors and windows to hide gaps and add style. Almost every home has them – they give your walls that “finished” look.
Can I install architraves myself, or should I hire a professional?
You can, but it demands patience and precision. If you enjoy DIY and have the right tools, go for it. Otherwise, hiring a pro guarantees a cleaner result and less frustration.
How much does Architrave Installation cost in Brisbane?
A typical job might cost a few hundred dollars depending on materials and labour. MDF is cheaper, while solid timber costs more but looks stunning.
What are common DIY mistakes with Architrave Installation?
Misaligned frames, wrong angles, and skipping measurements. Always check walls are straight and use proper nails for heavier trims.
Which architrave materials should I choose?
MDF is affordable and easy to paint, while hardwoods like oak or merbau offer long-term durability. Choose based on budget and style.